Thursday, January 9, 2014

Classic Sugar Cookies


My little boy turned 2 yesterday. It's hard to believe how quickly the time flies! So a recipe of sugar cookies just waiting to be turned into "Thomas" cookies seemed like the perfect way to celebrate. (If you have a toddler boy, you know exactly which "Thomas" I am referring to.) This recipe has been around my family since I was born and who knows where it actually came from originally. But it is definitely a good one. I've updated it a bit (crisco! bleh!) so I hope you enjoy this tasty cookie. It can be cut into any shape for every holiday of the year. Valentines day, Halloween, Easter, Christmas, St. Patrick's Day - This recipe gets a lot of use around my house!

You probably already have everything you need for this recipe which makes it even more convenient. Just raid your pantry and you should be good to go. 
Start by beating the softened butter. (Yes, it is important for it to be softened to room temperature - even when I try to use the microwave, the cookies never turn out as well. Just pull it out of the fridge when you get up, and take the time to let it soften while you shower, have that cup of coffee, and maybe run some morning errands) 


Anyways, dump in the softened butter, sugar, and vanilla and beat well. Then add the egg and beat until light and fluffy. Blend in the milk.


In a separate bowl, mix together the flour, salt and baking powder. 


Then slowly add in to the buttery mixture beating well. 


Dump that delicious dough onto some plastic wrap and wrap it up tight! Then pop it in the fridge and let it chill for at least 1 hour. (Another one of those annoying rules like the softened butter that is oh, so important - without chilling it, your cookies will "splat" while baking and lose their great cookie cutter shape.)


And wait.......patiently........


Ok good! Get the oven preheated to 375 degrees. Now the fun part. Use just half of the dough at a time and keep the other half in the fridge so it stays cold. Roll it out on a floured surface to about 1/4" thick.


Choose your cookie cutter and press away! Lay them out on parchment paper, or lightly spray a pan with non-stick spray. 


Pop them in the oven for just 6-8 minutes. They will cook quickly so don't go far! They are done when the edges barely begin to brown. 

Let them cool completely before frosting them. Then whip up your favorite recipe of Royal Icing and do crazy. Happy decorating!

Sugar Cookies
(24 cookies)
  • ⅔ cup Softened Butter
  • ¾ cup White Sugar
  • 1 tsp Vanilla Extract
  • 1 Egg
  • 4 tsp Milk
  • 2 cups Flour
  • 1 ½ tsp Baking Powder
  • ¼ tsp Salt

1. Beat together the softened butter, sugar and vanilla. Add the egg and beat until light and fluffy. Add the milk and blend it in.
2. In a separate bowl, mix together the flour, baking powder, and salt.
3. Add the dry ingredients in with the buttery mixture and blend together.
4. Wrap in plastic wrap and chill at least 1 hour.
5. Roll dough out on a lightly floured surface to 1/4" thick and cut with your favorite cookie cutter. Bake at 375 degrees for 6-8 minutes. Cool before frosting.


Tuesday, January 7, 2014

Mini Cinnamon Rolls


This post is to me a combination of several of my favorite things right now: breakfast foods, make ahead and freeze, and "mini." Somehow I am able to feel much more guilt-free if I am eating just a tiny bite-sized version of my food. (Does it matter if I then eat 5 or 6? Who's counting!)


I used my trusty bread-maker for this but if you don't have a bread machine, feel free to modify the recipe and use without!
Combine the milk and the butter in a microwave-safe container and warm it up to melt the butter. You are aiming for a temperature between 110-120 degrees so the yeast can do it's magical thing. If it's too hot, just leave it out for a few minutes to cool down. 

Add the milk, butter, vanilla and egg to the machine first. Then add the flour, sugar, salt and yeast. 

Set the machine on a dough setting and let it go! You want a setting that mixes it and let's it complete 1 rise cycle. Enjoy the next hour and a half of wonderful wait time. Do laundry. Clean the kitchen. Or sit by the window with a cup of coffee and enjoy catching up on TV shows like I am doing. It's the little things in life, right?

Once it is all done, punch it down and let it rest while you sprinkle some flour on the counter. 

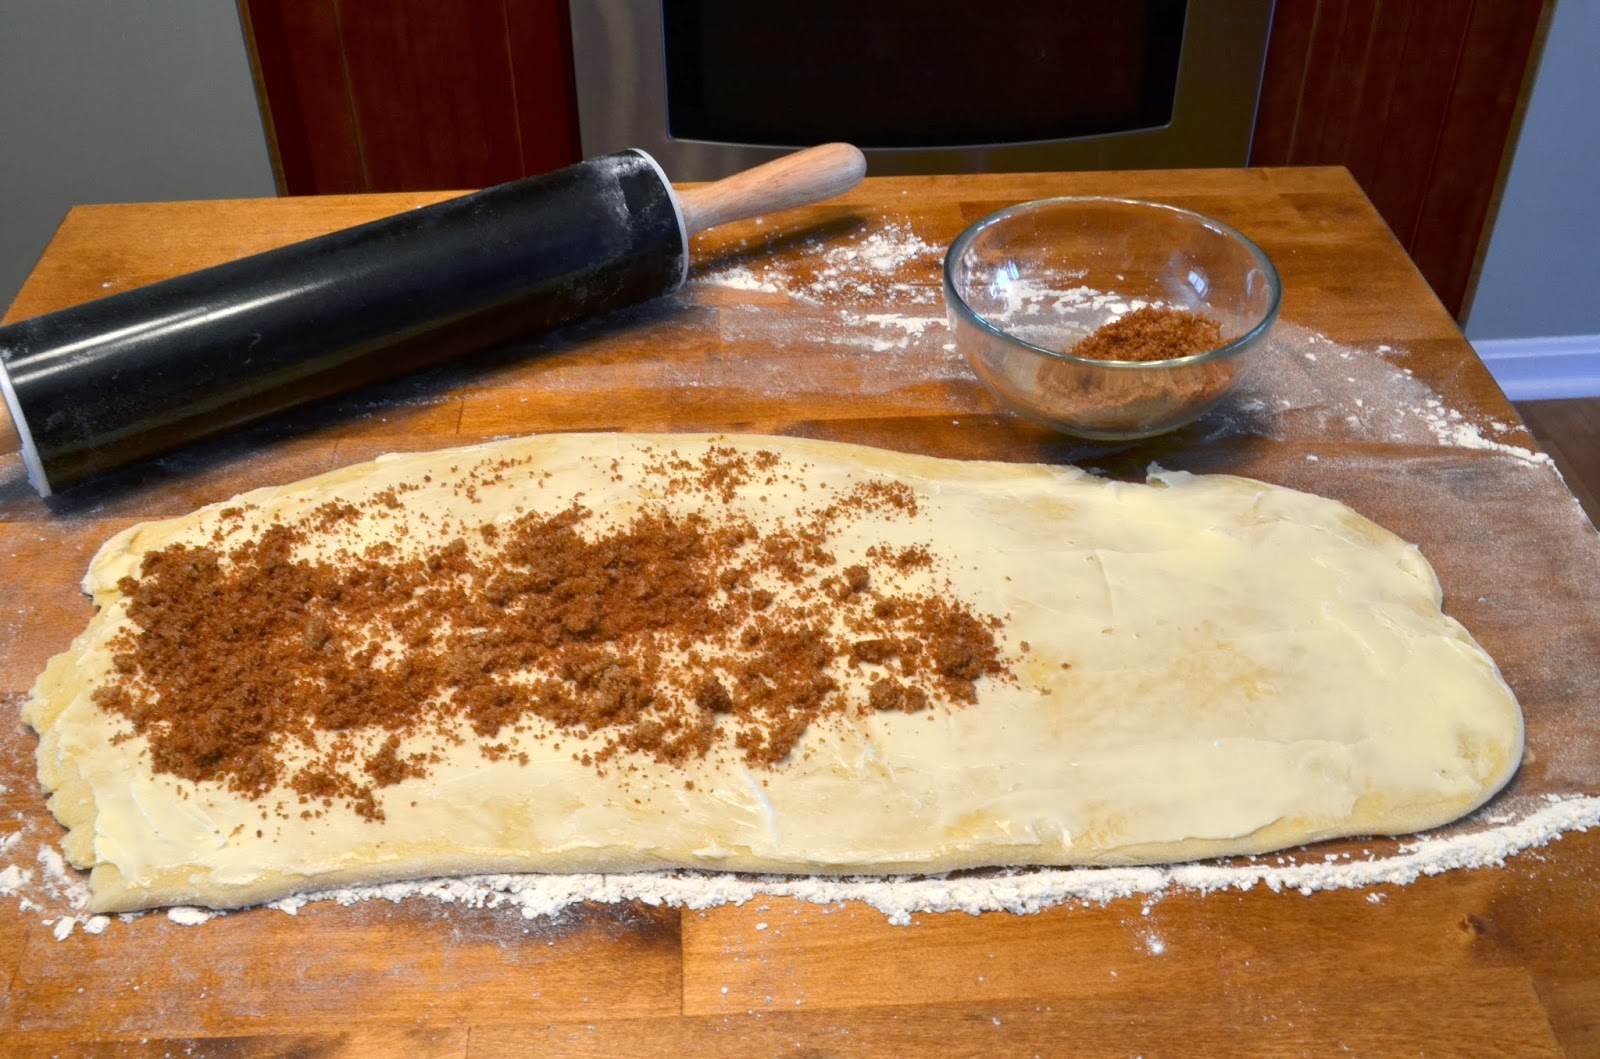
Roll it out into a long, skinny rectangle. Since you are going for mini's you want that extra length to the sides. (For normal-size rolls, go for more of a balanced rectangle instead of the above shape.)

Smear some softened butter all over it. Don't skimp! Give it a nice, thick coat. 

In a separate bowl, combine the brown sugar and cinnamon. 
Then sprinkle it evenly over the dough!

Then roll it up and slice about every inch. I ended up with a total of about 20 rolls. 

Spray a glass baking dish with non-stick spray and then lay out the rolls with a little bit of space between them. You want to give them space to rise a bit in the oven. Pop them in a pre-heated oven at 400 degrees for 12-15 minutes. until they have a nice golden brown color. 


Voila! You can enjoy a tasty treat without feeling the intense guilt of an enormous, gooey cinnamon roll. If you are an icing person, feel free to whip up a cream cheese frosting, or if you want something a little lighter, try this easy maple icing! 

Just mix up 1 1/2 cups of powdered sugar with 1 tablespoon of maple syrup and 2 tablespoons of milk. If you want the consistency thicker or thinner, feel free to add more sugar or milk as needed. Drizzle or spread over the top. 

If you want to freeze them and reheat throughout the week, just wrap each one in wax paper and then put them in a freezer bag. They make a great treat for these cold, wintry mornings. 


Mini Cinnamon Rolls
(Yield: 20)
  • ½ cup Milk
  • 1 Egg
  • ¼ cup Butter
  • 1 tsp Vanilla Extract
  • 2 cups Bread Flour
  • ¼ cup Sugar
  • ½ tsp Salt
  • 2 ½ tsp Yeast
  • ¼ cup Softened Butter
  • ½ cup Brown Sugar
  • 1 tbsp Cinnamon
1. Put milk and butter in a microwave safe container and warm to between 110 and 120 degrees.
2. Place milk, butter, egg and vanilla in the bottom of the bread machine.
3. Then add flour, sugar, salt and yeast on top. Set the machine on a dough cycle.
4. After the dough has completed one rise, punch it down and let it rest on the counter while you mix together the cinnamon and brown sugar. Preheat the oven to 400 degrees.
5.  Roll the dough out on a lightly floured surface. Aim for a long, skinny rectangle! Then spread 1/4 cup of softened butter evenly over it.
6. Sprinkle the cinnamon sugar mix over the top and then roll up the dough. Slice it every inch or so and lay the slices in a greased baking pan.
7. Bake for 12-15 minutes until golden brown.
8. Serve warm, add icing, or freeze as desired!


Thursday, January 2, 2014

Make Ahead Breakfast Sandwiches

Make Ahead Breakfast Sandwiches:


Happy New Year!

I am sure many of you are off and running with your new year resolutions, though from the looks of Facebook, it seems that resolutions are "out" this year and instead, a dedication to being in-the-moment and enjoying the little things in life, seems to be the focus of many. Well, whether you are looking to simplify OR get a healthier start to every day, these breakfast sandwiches are perfect for you! You can make a tray each weekend, freeze them, and simply use them as you need them, as they reheat easily in the microwave. They are also 100% customizable so you can use whatever ingredients you or your family likes best. I just used what was in my fridge for these ones. Yummy!


Bacon is my topping of choice as I get to enjoy the bacon in the sandwich, and can use the bacon grease as I cook everything else! But my husband also likes canadian bacon, sausage, ham, or any other meat as an add-on. Anyways, start with that tasty bacon and throw it in a pan on medium heat. Cook it until it is as crispy as you like! Place the bacon on paper towels and pour off *most* of the grease. (or all if you are feeling particularly healthy today) Add the diced onions, kielbasa, and mushrooms to the pan and cook until the onion is soft (about 3 minutes.) 

In a separate bowl, crack 6 eggs, and then add in the items from the stove, the green onions, and your cheeses. 
Whisk it together and add salt and pepper to taste. Grease a 6 tin extra large muffin pan. A regular size muffin pan might work but will give you very tall, skinny eggs! It might be tricky to bite into that sandwich. :) Spoon in the eggy mixture evenly into the pan. 
Bake for 12-15 minutes at about 350 degrees. You will know they are done when the middle of each egg puffs up a bit. Meanwhile...

Open up the English muffins and lay them out on a pan. I actually set a cooling rack on top of a baking rack to allow the bottoms to heat up as well. Then I add a thin layer of spray butter to each for some added flavor. This is totally optional but we enjoy it! You can also wait until they are toasted and then add spreadable butter if you prefer. Once the eggs come out...
...turn your oven to broil and slide in the English muffins. Don't leave them in too long or they will burn! Check them after 2-3 minutes. 
**If you are going to freeze the sandwiches, then take the eggs out of the pan and flash freeze them right away. I just lay them out on a plate and throw them in the freezer for 10-15 minutes while I wait for the muffins and do some light clean up on my kitchen.
Then, just lay everything out and start stacking your sandwiches! I like to add a small piece of cheese to the top just so it melts in the microwave when I reheat it. **If freezing then wrap each sandwich in wax paper and put in a ziplock bag. They freeze well for at least a month - I haven't tried longer! To reheat, you can either pull it out the night before and put it in the fridge (My husband's plan) or just take it out in the morning because you forgot the night before (my plan.) If it is still frozen-ish it might need about a minute, and if not, 30 seconds should do. Voila! A tasty breakfast for every day this week.